Assigning items in Warehouse
Content was last updated in 06.01.13-00
Revision History
Items that
are unavailable can be assigned as sub-rentals, transfers, purchases or
exchanges in either the Account module or Warehouse. Items not assigned
when the order is created (as a Reservation, Hold or Contract) must be
assigned in the Warehouse module before the item can be filled.
To assign an item
within Warehouse:
Click
on the Assign icon  or View > Warehouse >
Assign to display the Assign window.
or View > Warehouse >
Assign to display the Assign window.
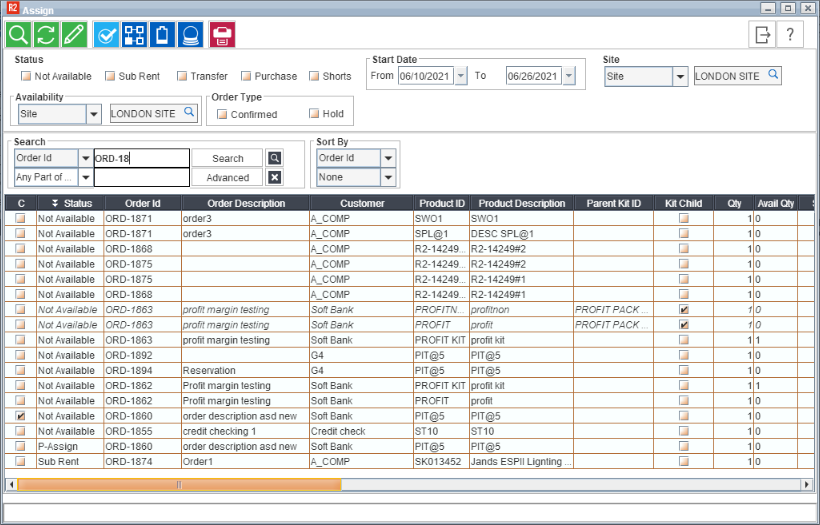
In
the Assign window, click on the Search button to view all Items that
need to be assigned or perform a search.
A
list of Not Available items will appear.
Select
the first Item you wish to assign. Select the line and click Assign
icon
on the toolbar OR right click the line and select Assign to display
the Assign
dialog.
Click
on the radio button and select an Assign option.
Click
OK.
Depending
on your selection, this will return you to the Warehouse window or
prompt you for additional information.
To Sub-Assign
within warehouse
Follow
the initial steps of assigning and in the step 5 select Sub-Rental
in the Assign dialog.
See
Assign
Vendor Dialog Window.
Select a vendor
assign option.
Choose
User Assign, if you want to
designate a vendor from whom item has to be rent and create a Sub-rental
PO.
Choose
Assign Later, if you want
to just indicate that the item needs to be sub-rented but assign a
vendor and create a PO later.
Click
OK.
If you have chosen
Assign Later in previous step, the Sub-Rental Assign dialog
will close and the item status will be changed to S-Rent. To generate
a Sub-Rental PO, you will need to return to the Vendor Assign dialog
and complete the steps for User Assign.
Click OK.
Depending on your
selection, you will now be able to choose which Purchase Order you
would like to make additions to, or you will be prompted to create
a new Purchase Order.
Using
an Existing Purchase Order
Creating
a New Purchase Order
The
sub-rental purchase orders that are generated in this manner can be searched
for and viewed in the Sub-Rental window.
To
Transfer-Assign within Warehouse
Follow the initial
steps of assigning and in step 5 select Transfer In.
See
Transfer Assign
Window.
Select a transfer
assign option
Choose User Assign
if you want to select a site now from which item has to transferred
in and create a Transfer Order. Choose Assign Later if want to just
indicate that the item need to be transferred and create the Transfer
order later
Click OK.
If you have chosen
Assign Later in step 2, the Transfer Assign dialog will close and
the item status will be changed to Transfer. To generate a Transfer
Order, you will need to return to the Transfer Assign dialog and complete
the steps for User Assign.
If you have chosen
User Assign in step 2, the Transfer order dialog will appear. Select
either Use Existing Transfer Orders or Create New Transfer Order
option.
Click OK.
Depending on your selection in Step 3,
you will now be able to choose which Transfer Order you would like to
make additions to, or you will be prompted to create a new transfer order.
Use
Existing Transfer Order
Create
New Transfer Order
To
Purchase-Assign an item within warehouse
Purchase
assign is similar to Sub-assigning. Only difference is that you need to
select Purchase option instead of Sub-Rental option on the Assign Vendor
dialog.
The
purchase order created after Purchase-Assign is of type Inventory and
purchase order created after Sub-rental assign is of Sub-Rental type.
To
Exchange an item
Follow the initial
steps of assigning and in step 5 select the Exchange option in the
Assign dialog.
Click OK. A search
window appears initially listing all the items belonging to the exchange
group of the item selected, of the current site. You can also exchange
items with the items of this exchange group belonging to other sites
also. Use Site, Region, Sub-Region, All filters to find for these
items.
Select the items
to be exchanged with and click OK. Those items will be replaced by
the exchangeable item on the order.

|
Before
you can exchange for an item, an exchange group must first exist
for that item.
You
can exchange a Serial Item with a Serial item, Non-Serial item
with a Non-Serial item, Serial Kit with a serial kit and Package
with a Package only. |