The ability to define User Defined Fields specific to Service Work Order, so that the user can have different set of user defined fields in Service Work Order to be filled in Service Work Orders.
User Fields Data Conversion Support for Service Work Order in 'User Fields’ Data Conversion
See table below:
Type |
Name |
Supported |
14 |
- |
Not Supported |
15 |
- |
Not Supported |
16 |
Service Work Order |
Supported |
For more details on S W O, please refer Table 37.0 in Section User Fields in DataConversion.doc available in \sqls\DataConverter folder
Go to R2 Launch Pad and Click on Configuration icon.
In the Configurations module, go to General tab and Click User Fields Setup icon.(As shown in Figure 1.0).
The system displays the User Field Setup dialog box. (As shown in Figure 2.0).
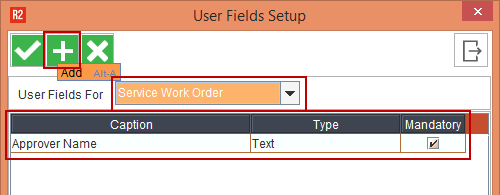
In the Configurations dialog box, use the drop-down list User Fields For to select the Type for which User Defined Fields (UDF) needs to be configured. (As shown in Figure 2.0).
Then click Add icon. (As shown in Figure 2.0). This will open the User Field Add dialog box (As shown in Figure 3.0).
Note:
If the selected module has any existing UDFs, it will be displayed in the dialog box. (As shown in Figure 2.0).

This dialog box has 5 fields. Give a name to the new UDF and chose its type.
Notes:
If you are defining multiple fields, the position depicts the placement of this particular field in the order of the fields being defined.
The Mandatory Checkbox (As shown in Figure 3.0). is to be used only when we want the field to be compulsory while filling the respective form,
Click Save to complete the User Defined Field Configuration process.(As shown in Figure 3.0).
Save the configuration settings. Re-launch the R2 application.
Go to R2 Launch Pad and Click on Service Module.
In the Service module, use the Search option to find the relevant Work Order, using an Order ID.
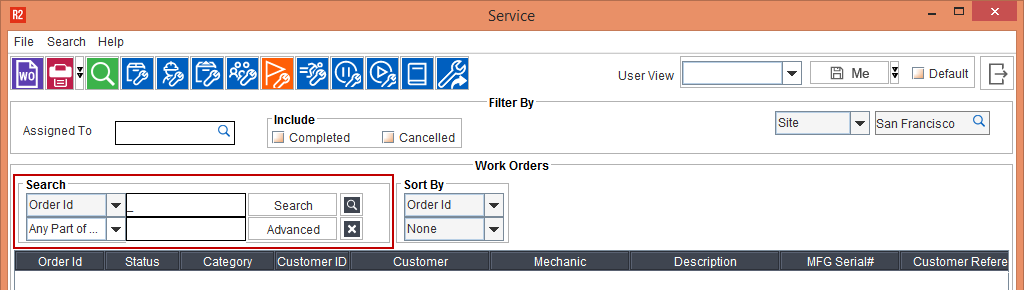
The system displays a list of Work Orders (As shown in Figure 5.0)

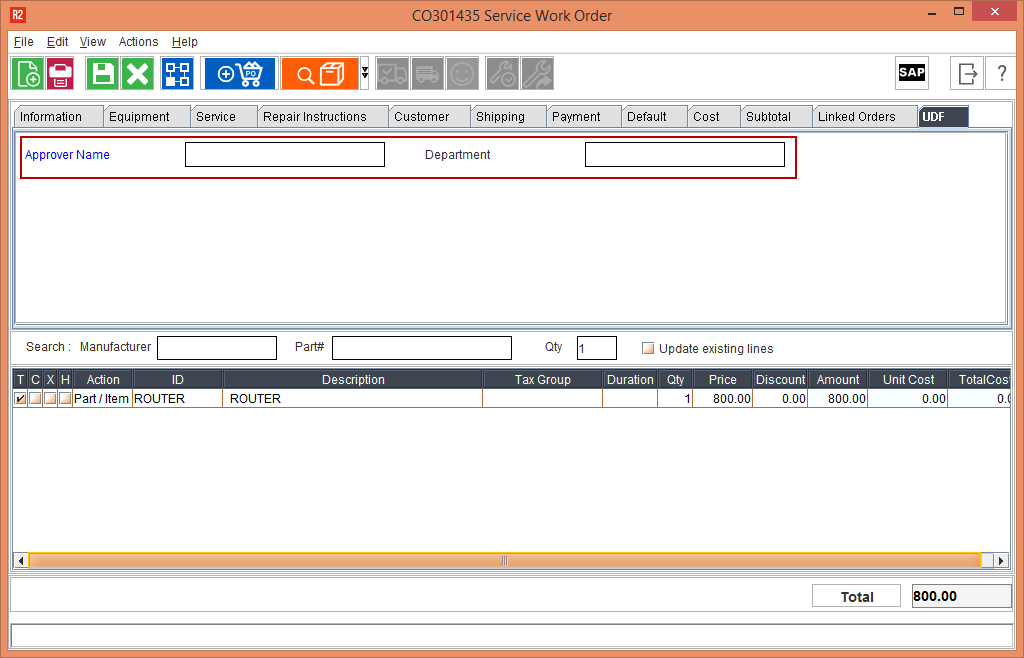
Open that service work order, then click on the UDF Tab to view and use the User Defined Fields. (As shown in Figure 6.0)
Define the User Defined Fields here, and click on Save.
Note: The UDF in Blue are Mandatory Fields, while the one in Black are optional.
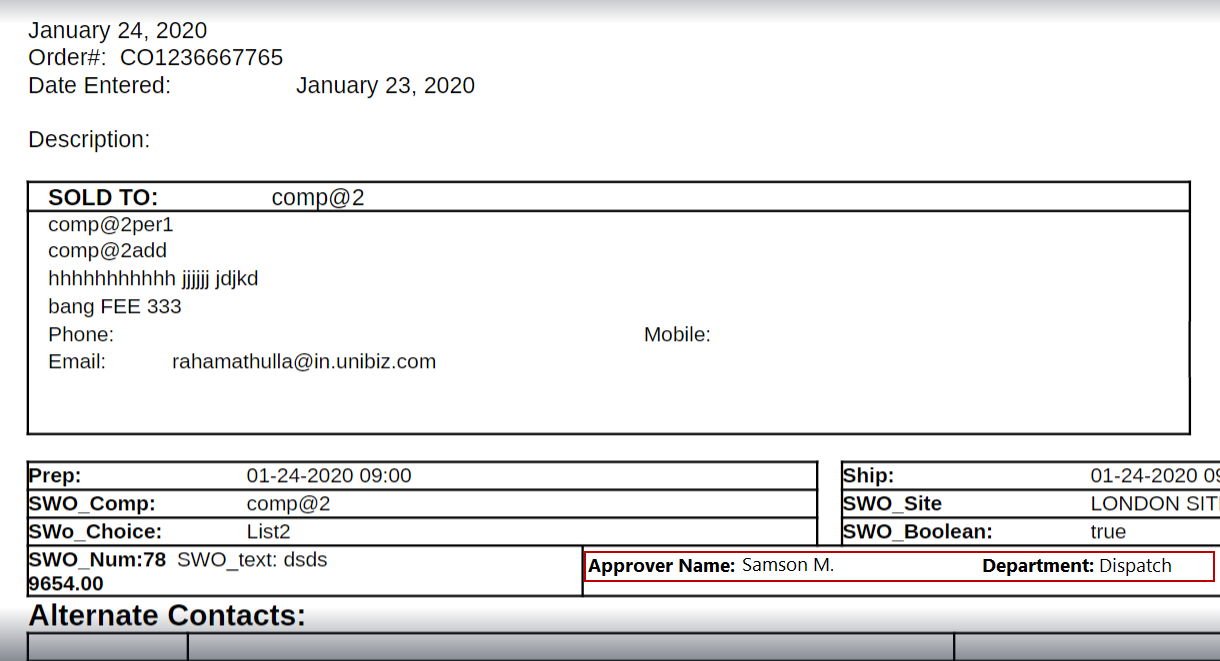
To generate a report for this quote, click the print icon. (As shown in the Figure 7.0).

Use the form drop down list to select the relevant report template.
Select the output format as Word or PDF.
Once the report is generated, you can see the output in a new window.(As shown in the Figure 8.0).