Content was last updated in 06.22.05-00
The task and dates are two important parts of a booking line. At times, even after a Timesheet is created for the booking line, there might be a business reason to modify the task/dates in R2.
For example: The crew has been assigned with additional responsibility for the same set of date or the crew' schedule is extended or reduced.
In such cases, there might be a data sync issue between R2 and Labor on a booking line having Timesheet.
When we say 'Booking line having Timesheet', it meant that system skips the EWTs having timesheet and sync the changes to rest of the EWTs.
This feature helps us bridge the information gap between R2 and Labor. Given below are the three scenarios.
The tasks and dates delta sync is applicable when Configuration flag 'Split Labor Line by Qty' is true.
Create an Order, add Labor positions and assign the EWT.
Open Labor app > assign and confirm the resource.

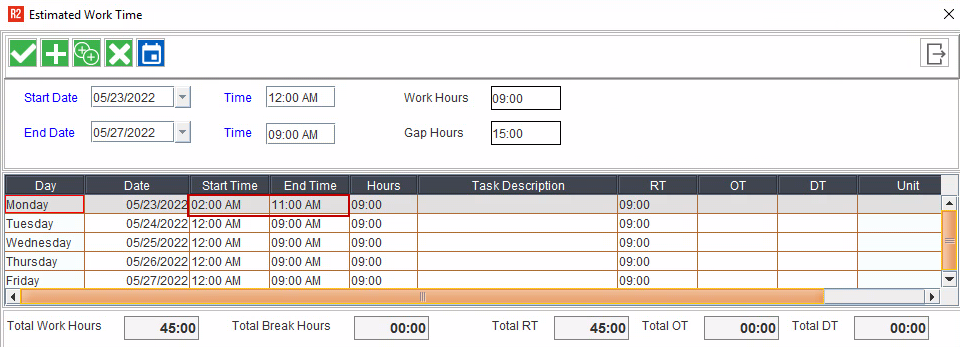
Create a Timesheet for the few dates.

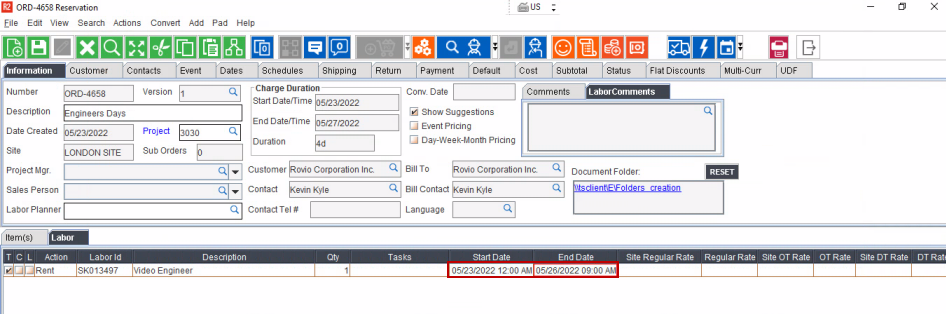
In R2, modify the dates (Last date is changed to show the sample workflow).
Now, reset the Task/dates in R2 Labor.
You will see the 'Start and End Date' in red font indicating that the changes is synced to the booking line.
End Date is updated.
A message displays to inform that the sync didn't happen for the dates having Timesheet.
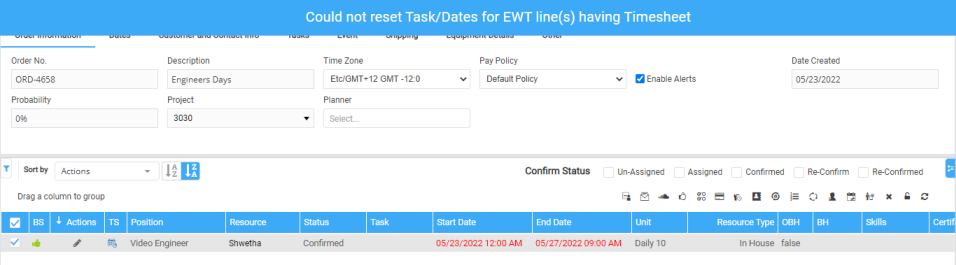
Open the 'Assign Dates' window for the booking line and you will see the dates having Timesheet in red font which is to indicate that the changes didn't sync for the dates having Timesheet.

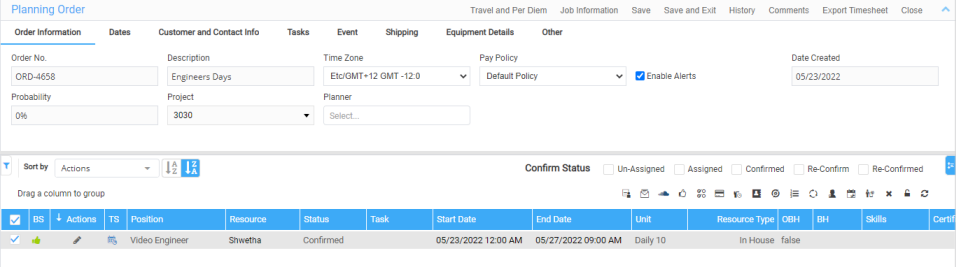
Since you are aware of the sync changes, you can change the red font to black by clearing the conflicts. To do that, click icon.
You will see the changes in block font now. The conflict clears in Assign Dates as well.
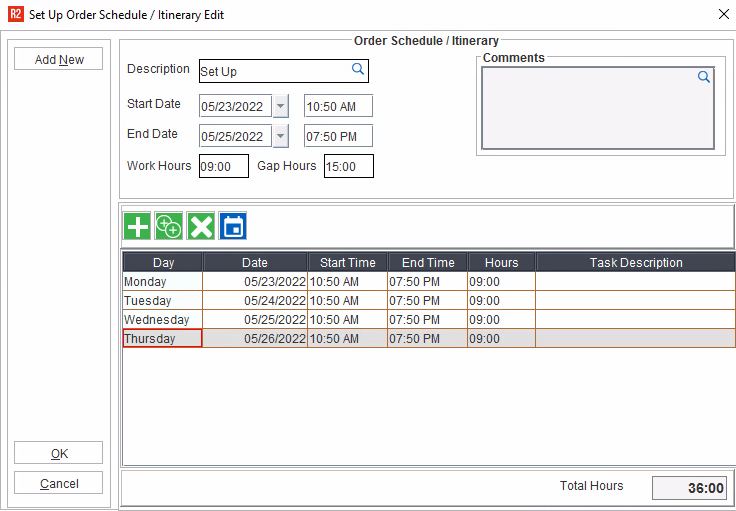
Create an Order, add Labor positions and tag the task to the line.

Open Labor app > assign and confirm the resource.
Create a Timesheet for the few dates.
In R2, modify the dates of the task. (Last date is changed to show the sample workflow).
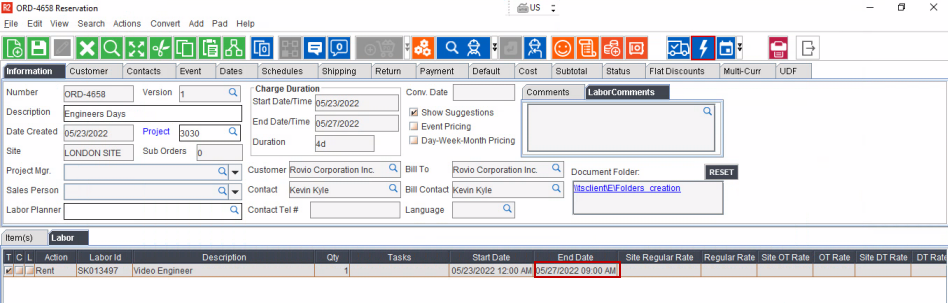
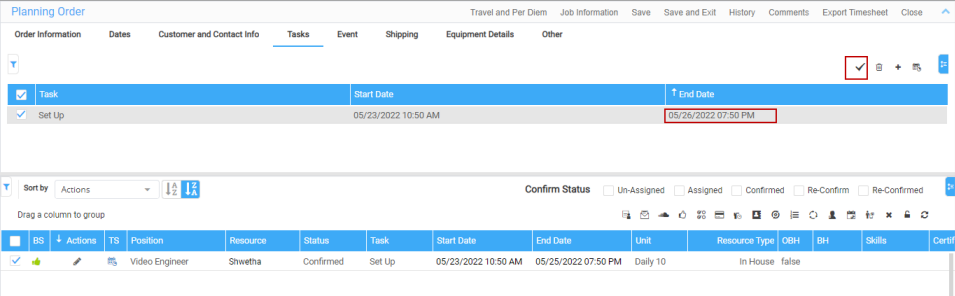
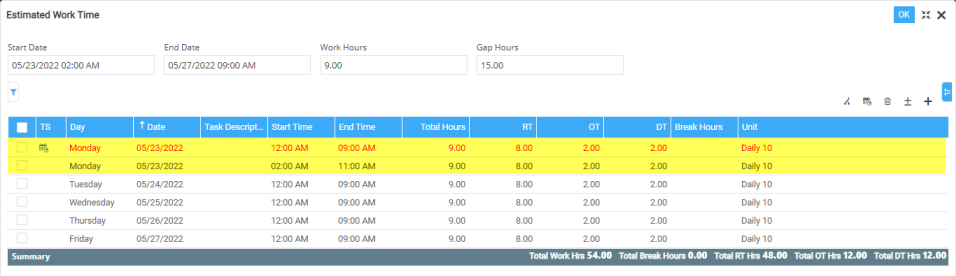
In R2 labor, click Task tab and you will see the task date being updated. But in the booking line, you still don't see the end date being updated as shown in Figure 2.2
To apply the updated task details to the booking line, select the booking line and task line > click 'Apply to Lines'.
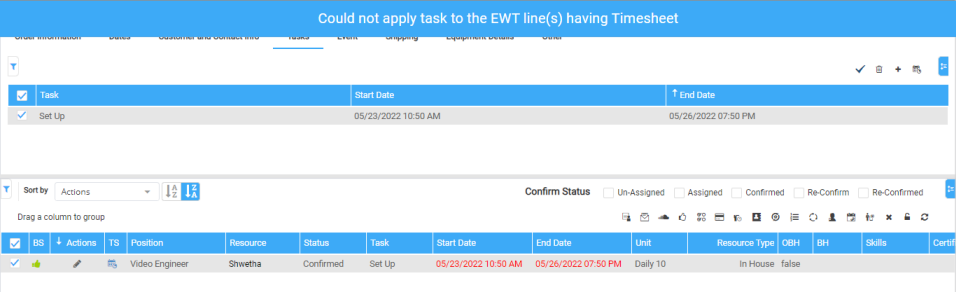
You will see the 'Start and End Date' in red font indicating that the changes is synced to the booking line.
End Date is updated based on the task details.
A message displays to inform that the sync didn't happen for the dates having timesheet.
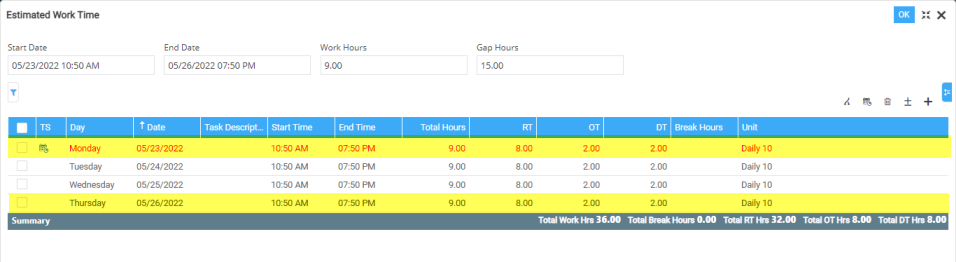
Open the 'Assign Dates' window for the booking line and you will see the dates having timesheet in red font which is to indicate that the changes didn't sync for the dates having Timesheet.
Since you are aware of sync changes,
you can clear the red font to black by clearing the conflicts. To
do that, click  icon.
icon.
You will see the changes in block font now. The conflict clears in Assign Dates as well.
When you modify the labor line having Timesheet in R2. In such case, system shows a new EWT date with the modified details in Labor > Assign Dates.
Modify the time portion for date having Timesheet in R2.
Now reset the Task/dates in Labor.
You will see the 'Start and End Date' in red font and also a message displays to inform you that the changes didn't sync for the dates having Timesheet as shown in Figure 1.4
Open the 'Assign Dates' window and you will see the dates having timesheet in red font along with the new EWT with the modified time portion.
You can clear the red font to black
by clear the conflicts. To do that, click icon.