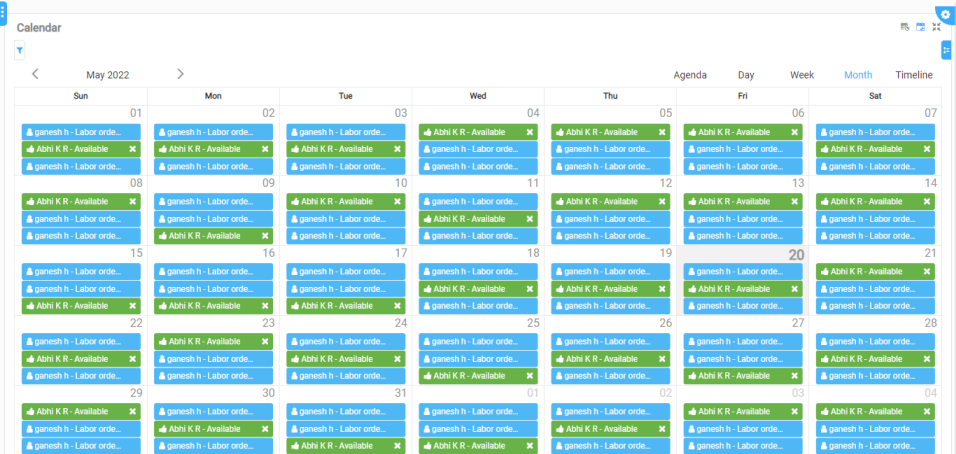
The Calendar section is the main component of the landing page in Labor once you login.
Analogically, the Calendar is simply just what the name implies. It is an array of dates, along with appointments on a specific date (resource schedule/ leave schedule/ events and so on), Also, these tasks are color coded on the basis of whether the resource has accepted, confirmed, or declined them.
The activities displayed on the calendar includes the position assignments to jobs and resource calendar updates. The Planner can also add calendar events to a resource’s calendar.
There are four options to view the activities:
Month: Displays the activities for the entire month. By default, you will see the activities in month view.
Weekly: Displays complete 24 hours details for seven days (Sunday to Saturday) in vertical bars.
Day: Displays the activities of an entire day (24 hours).
Agenda: Displays the data based on the events.
Timeline: Displays the activities based on the timings.
When you mouse hover on each of the assignments, a popup displays all the relevant information related to the assignment. As obvious, since this is a dashboard, all information is a view-only. And any changes to there-of must be made via Planning Order, Graphical Scheduler, or Whiteboard.
Planner has two views in the calendar
My calendar —To view the activities of the logged in Planner.
Scheduling calendar —To view the activities of all the Planners'.
The default view is to display planner calendar.
My calendar lets you to view the jobs, or events assigned to you. You can also create an event for the specific date and assign it to the crew or for yourself. See Figure 1.0
Scheduling calendar lets you to view the jobs, events assigned to the planners' in the entire organization. You can also create an event for the specific date.
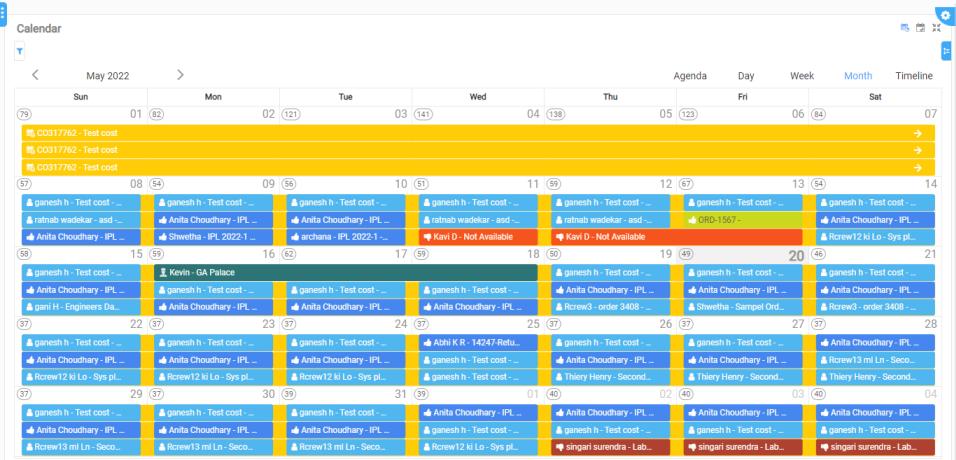
Click on any date cell and 'Calendar Events' pop-up displays.
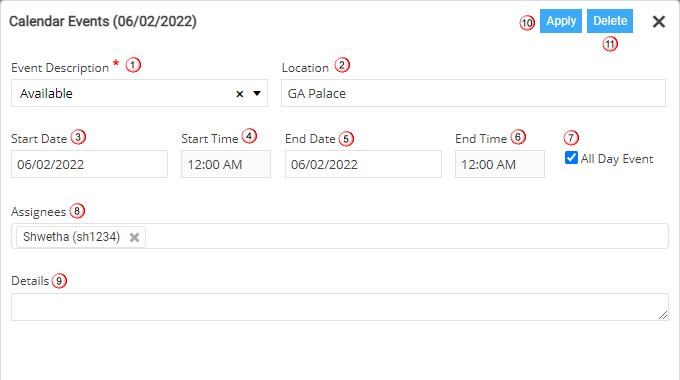
Event Description: You can either select the pre-defined event from the dropdown or key in the event and the keyed in event displays in the dropdown to select.
Location: Provide the location of the event.
Start Date: Choose the Start date of the event.
Start Time: Select the start time of the event.
End Date: Choose the End date of the event.
End Time: Select the start time of the event.
All Day event: Select the checkbox if the event is for whole day.
Assignees: Select the Crew from the dropdown. You can assign the event to multiple crews also.
Details: Key in the details of the event if required.
Apply: Click the apply button. The created event displays in the crew calendar as well.
Delete: To delete the event.