Content was last updated in 06.01.17-00
Company refers to the business entity with whom you are going to conduct business through any project/event/rental/sale. A company can be a Corporation, a Government organization, a 3rd-party vendor, or even an individual.
You can add and maintain companies information here. To create a company record, you must mandatorily provide a unique name, a company type, at least one contact person's information.
The companies added, transverse through a process from Suspect > Lead > Prospect > Customer. However, it is not necessary for you to follow the process, you can change the phase to the other one at any time.
Once the company has reached a Customer phase, the company information in your CRM can be pushed to R2 application thereby avoiding manual entry of company information in R2.
The Company search window consists the following:
Suspect: This tab contains the suspect customers list.
Lead: This tab contains the lead customers list.
Prospect: This tab contains the prospect customers list.
Customer: This tab contains all the customers list who are agreed and started business with you.
Add Company: To add a new company information. know more?
Company records: Displays the companies list based on which tab you are currently in. For example: If you are in 'Customer' tab, then you can only view the data of a company who are customer for you.
Search grid: To search the company through the search grids which are available in each column headers of the table view. Know more about search grids.
In the navigation
bar, click the Company ![]() icon.
icon.
In the company search window, click Add Company.
By default, you will see the 'Suspect' tab in the window. All the suspect customer lists here.
Similarly, the 'lead/prospect/customer' records lists in their respective tabs.
|
Your window may not shows any data on first usage. |

The 'New Company' form displays.
New Company form has three tabs as mentioned below.
General Information: Contains company's basic information like company name, address etc.,
Contacts: Contains company's contact details.
Orders/Invoices: Contains quotes/reservations/invoice details generated against a company.
To view the company search window in the left-side view port, click the re-sizer icon as highlighted below.

Under General Information tab, you will see the following four sections that required to fill to create a company.
In this section, you can enter the company's general information like company name, customer type etc. as shown below.

Name: Provide a unique company name in the textbox. It is mandatory to fill this field.
Phase: There are four phases in the dropdown. Select any one of them based on your need.
Suspect: When you are exploring the possibility of having a lead from the company.
Lead: When you are already exploring the opportunity to have a line of business with the company.
Prospect: When you expect to start a line of business with the company.
Customer: When you have an existing line/started a line of business with the company.
Once the company is saved, the added company sits either in 'Suspect/Lead/Prospect/Customer' tab based on the phase selected. For example: If the phase is selected as 'Prospect', then after saving, the company reflects in the 'Prospect' tab.
|
A company can move through phases in any direction or number of steps. You can manually set the phase based on your organizations processes. |
Status: You have four dropdown values to select the company status. Select any one of them.
Active: When the company is already conducting business with you.
Inactive: When the company is not currently conducting business with you.
Potential: When you expect the company to start working with you very soon.
Frozen: When the company was working with you earlier but has stopped now.
Category: It refers to the classification of the company that belongs to. You have the following dropdown values, select the appropriate one.
Customer: When the company receives service from you.
Vendor: When company provides the service for you.
Both: When the company is both the customer and vendor for you.
Type: There are two types of companies listed in the dropdown as shown below. Select the appropriate one.
Normal: When the company is just like any other customer/vendor you are working with.
Privileged: When you are providing/receiving customized services to/from the customer/vendor.
Customer Type: It refers to the type of the customer belongs to. Select the appropriate customer type from the dropdown.
Web: Provide the web address of the company. The correct format to key in your web URL is to add the http:// or the https:// prefix in front of your URL (i.e., https://www.yourcompany.com).
Phone: Provide the correct phone number of the company.
Fax: Input the company's fax number.
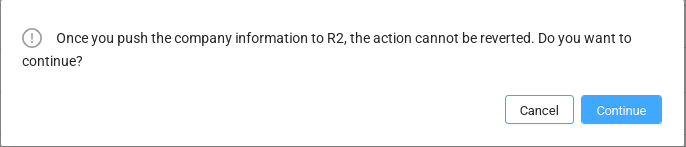
Push to R2: Once a company transits to a 'Customer' phase, the company can be pushed into R2. This helps eliminate double data entry and the errors that are inherent in that process. Click the 'Push to R2' toggle button, you will see a confirmation pop-up, click Continue to push the data to R2. Otherwise, click Cancel.
|
Once the data is pushed to R2, the Phase field and Push to R2 toggle button will be disabled and the action cannot be reversed. |
You have added general details of the company!!. Now, lets move to add the contacts for the company.
This section is to add company’s main address information.
Enter the details of main address in the provided fields.
'Street' and 'City' are the mandatory fields to save a company.

Here, you can capture the company’s billing address information.
If the main and billing addresses are same, click Copy Main address link to copy the main address information to billing address. Otherwise, provide the details for the billing address in the respective fields.
'Street' and 'City' are the required fields to save a company.

Here, you can capture additional information of the company like industry type, and employee count etc.,

Industry Type: Select the type of business the company working for.
Days in the Week: Enter the number of days the company works in a week in the textbox.
Days in the Month: Enter the number of days the company works in a month in the textbox.
Employee Count: Input the strength of employees' in the textbox.
Annual Revenue: Enter the company's annual earning per year.
Alias:Provide a more familiar/identifiable nickname for the company (if needed).
Rating: You have three dropdown values for rating the company. Select the suitable one.
Cold: When the chances of doing the business with the company are minimal.
Warm: When the chances of doing the business with the company are near average.
Hot: When the chances of doing the business with the company are extremely high.
Each company should atleast contain a single contact to save the company. You can add multiple contacts and designate any contact as primary.
After adding the company details in the 'General info' tab, click Contacts tab.
Click Add Contact button.
Add/Edit Contact window displays.
Enter the contact details in the respective fields.
'First Name', 'Street', and 'City' are mandatory fields to save a contact.
By default, address details are auto populated from the main address. However, you can change it further, if required.
Click the 'Primary' toggle button to set the created contact as primary for the company.

After adding the contact details, click OK button to save it (see figure 4.0).
You have completed adding contacts for the company as well!!
|
The tab at the top of the window shows the company name. The asterisk symbol indicates that the changes are not saved yet as shown in Figure 5.0 |
Now, its time to save the company details.
To save the Company, Click the Save button at the top right corner as shown below.

|
You can also create a task and opportunity from company tab as well (see figure 9.0). |
Once a company transits to 'Customer' phase in CRM, it can be viewed from within R2.
A summarized version of quotes/reservations or invoices generated in R2 against the company is visible in 'Orders/Invoices' tab. These Invoices/Orders are however visible only in read-only mode. Also, you can filter the data in this tab.
To view the Order/Invoice details,
Click the Orders/Invoices tab.
Click ID link as shown below.

A summarized view of an invoice/order displays and it consists of the following three tabs.
Equipment: Displays the Item related details.
Labor: Displays the Labor position details
Order Details: Displays the quote/reservation details.
Editing refers to altering or modifying an existing record/information of the company. During editing, all the fields of the company are available for modification.
Search for the company and click the Edit icon.

The edit window displays.

Modify the data as required and click the Save button.
A confirmation message displays once the changes have been saved.